
How to set up No Server Downtime Deployment for Azure Functions in Jenkins?
-
 Eric Wei
- 5 Min To Read
- 16 Sep, 2021
Assuming you have developed APIs on Azure Functions, you may be wondering how to update Azure Functions without server downtime.
The answer is Blue/Green Deployment.
I am so surprised that Azure Fucntons provides such a useful feature to improve work productivity.
I used to spend a lot of time creating Blue/Green deployments in EKS on AWS using Jenkins because AWS did not support it.
Now, with Azure Functions, I can save a lot of time without managing the infrastructure and overhead of creating this deployment.
So I decided to write down and share my experience in this post.

In this tutorial, you will learn
- What are Blue/Green Deployments?
- How to create a script to deploy Blue/Gree Deployment for Azure Functions using Jenkins?
What are Blue/Green Deployments?
Basically, you can deploy a new version to the server instances in the staging bucket.
Once you finish the deployment, you will get a separate API endpoint in the staging bucket, allowing you to carefully run unit tests on the new version of servers before switching it to production.
The best part is that the Azure Functions external API endpoint is the same in production, even if you swap the staging instance from staging bucket to production. It’s recommended to run API unit tests on the staging server instances to ensure high stability of your services before swapping them to a live environment.
Next, I will show you how to create a script to execute Blue/Green Deployment for Azure Functions on Jenkins to improve your workflow.
Prerequisite
- Azure Developer Account
- Azure Functions
- Mac OS
Before we get started, you should have an Azure Developer Account and Subscription on Azure, and know how to create Azure Functions.
If not, you can refer below for the details.
How to integrate Azure Function and SQLite?
Setup Environment:
- Install Jenkins on Mac
- Install Azure CLI on Mac OS
- Install .NET Core
Firstly, you should have installed Jenkins on Mac OS.
Then Install Azure CLI
brew update && brew install azure-cli
Download .NET on Mac OS, so that you can type the command dotnet to build Azure Functions.
How to create a script to automate Blue/Gree Deployment for Azure Functions using Jenkins?
Then let’s create a script as below.
Step 0: Define parameters
- You need to define Azure’s user name, password, subscription name, and Azure function.

Step 1: Log in to Azure
- If you have Azure CLI installed, you can run az login and az account set below to log in to Azure.
Step2: Build Azure and deploy to Staging
- You need to build and publish Azure Function.
- Once you publish Azure Function, you can pack and deploy it to Staging Azure Functions.
- Then we will stop, deploy, and start Azure Function on Staging Bucket for updating Azure Functions.

Step3: Run Unit Test & Swap to Production
- Then you should run the curl command to send an HTTP Request to your API endpoint for running the unit test. This can verify the accuracy and health of your API endpoints.
- If it’s fine, then swap the staging instance to production.
- Finally, we must stop the staging instance to save costs.

Why do we need to stop staging instances after deployment?
Because this can save your server costs while not using it.
Lately, let’s put it together in a script like below.
#!/bin/bash
dir=$(pwd)
TS=$(date +"%Y%m%d%H%M%S")
AZURE_USERNAME="<Your Azure username>"
AZURE_PASSWORD="<Your Azure password>"
AZURE_SUBSCRIPTION="<Your Azure Subscription>"
AZURE_RESOURCE="<Your Azure Resouce Name>"
AZURE_FUNCTION="<Your Azure Function Name>"
SOURCE_SLOT_NAME="staging"
TARGET_SLOT_NAME="Production"
PUBLICH_ZIP="function-${TS}.zip"
OUTPUT_PATH="${dir}/output/"
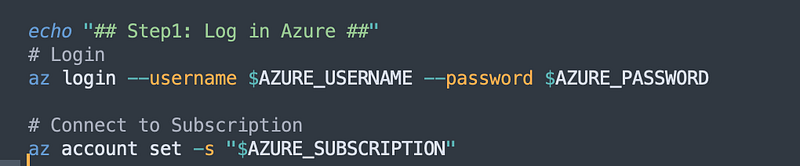
echo "## Step1: Log in Azure ##"
# Login
az login --username $AZURE_USERNAME --password $AZURE_PASSWORD
# Connect to Subscription
az account set -s "$AZURE_SUBSCRIPTION"
echo "## Step2: Build Azure and deploy to Staging ##"
# Clean up
/usr/local/share/dotnet/dotnet clean YourCloudFunction/YourCloudFunction.csproj
echo "## Build Azure Function ##"
# Build
/usr/local/share/dotnet/dotnet build YourCloudFunction/YourCloudFunction.csproj
echo "## Publish Azure Function ##"
# Publish
/usr/local/share/dotnet/dotnet publish YourCloudFunction/YourCloudFunction.csproj
echo "## Pack Azure Function ##"
rm -rf ./output
mkdir output
cd ${dir}/YourCloudFunction/bin/Debug/net6.0/publish
zip -r $PUBLICH_ZIP *
mv $PUBLICH_ZIP ${dir}/output/
echo "## Stop Staging Azure Function ##"
az functionapp stop -g $AZURE_RESOURCE -n $AZURE_FUNCTION --slot ${SOURCE_SLOT_NAME}
echo "## Deploy Staging Azure Function ##"
az functionapp deployment source config-zip -g $AZURE_RESOURCE -n $AZURE_FUNCTION --slot ${SOURCE_SLOT_NAME} --src ${dir}/output/${PUBLICH_ZIP}
echo "## Start Staging Azure Function ##"
az functionapp start -g $AZURE_RESOURCE -n $AZURE_FUNCTION --slot ${SOURCE_SLOT_NAME}
sleep 10
echo "## Step3: Run Unit Test & Swap to Production ##"
# Run Unit Test
response="$(curl -X POST \
'https://<Your Azure Function Domain>/api/<API Name>?code=XXXXX' \
sleep 2
echo "response: '$response'"
status="$(echo $response | jq -r '.status')"
echo "status: '$status'"
if [ "$status" == "200" ]
then
echo "Staging Development is OK"
echo "## Deployment Slot Swap ##"
az functionapp deployment slot swap -g $AZURE_RESOURCE -n $AZURE_FUNCTION --slot $SOURCE_SLOT_NAME --target-slot $TARGET_SLOT_NAME
echo "## Stop Staging Azure Function ##"
az functionapp stop -g $AZURE_RESOURCE -n $AZURE_FUNCTION --slot ${SOURCE_SLOT_NAME}
else
echo "Failed to deploy Staging Development"
fi
Note
- You can create a pipeline to execute this script to automate deployment to increase work efficiency.
Congratulations

In this tutorial, you learned how to create a script to automate Blue/Green deployment for Azure Functions in Jenkins without server downtime.
Moreover, you can make it even more convenient by integrating Slack messages to deploy Azure Functions by typing a single command.
How to integrate Hubot with Jenkins and Slack?
If you found this article helpful, please follow us on Facebook to get the latest tutorials in the future.
Thank you for reading!