
How to build high traffic WordPress in Lightsail on AWS?
-
 Eric Wei
- 6 Min To Read
- 10 Aug, 2021
In this article, we will detail how to design high-traffic websites and show how to set up WordPress with high availability, scalability, and security on Lightsail.
Lightsail is an easy-to-use service, but you still need to spend time setting up a load balancer and wp-config.php to make it function well. If you follow some tutorials to set up Lightsail, you might not know the reason why it should be set up like that
This tutorial will detail
- why and how to design a high traffic architecture.
- how to set up WordPress to achieve high availability and scalability.
Designing High Traffic Website
A common architectural design pattern is shown below.

This pattern contains three layers.
Front-end Layer
- includes a client-facing Loadbalcer that can smoothly redirect traffic to different servers.
- can ensure failure tolerance without any downtime.
- If one application server goes down, the load balancer will redirect the traffic to a healthy server.
- the load balancer periodically sends health check requests to check the availability of servers.
Computing Layer
- is responsible for processing API requests and querying databases on different kinds of computing resources such as EC2, ECS, or EKS.
EC2
- You need to set up an auto-scaling group and metrics in CloudWatch to auto-scale out EC instances based on the usage of CPU or Memory threshold.
- can be set up in the different zone to achieve fault tolerance.
- If a server goes down in one zone due to a hardware outage, the services can still keep alive by another EC2 in a different zone.
ECS / EKS
- ECS / EKS is a serverless service that can ensure scalability and availability without human administration on EC2 instances.
Database Layer
- includes MYSQL DB or Redis Cache
- MYSQL DB: Aroura Cluster or RDS
- Cache: Redis Cluster
- To achieve better performance and reduce bottlenecks on MYSQL, we will cache data in Redis Cluster.
*Why not put the server and database in the same layer to reduce the complicity?*
Because if you put everything on the same server, you might have a single point of failure. When your server or database goes down, your services will be forced to stop and recover. This might cause bad user experiences.
Therefore, we usually separate the front-end, application server, databases into a different layer. Each layer is independent of each other, so as application server and database can smoothly scale-out and ensure high availability to meet the growing demands of traffic.
Route 53
- allows you to set up the domain name of the load balancer.
- If you want to upgrade the infrastructure and achieve high availability, you can easily change the domain name on Route 53 to redirect traffic to a different load balancer.
CloudFront & S3
- CloudFront acts as a cache layer to cache assets files from S3 like images, sounds, or other resource files.
- CloudFront can save your money to reduce the downstream traffic from S3.
The basic concept is making your application become stateless which means the application server treats every request the client has made as a completely new request.
For instance, an application should not save user data in the server’s memory, but in the shared Redis Cluster. This can help application servers smoothly scale out EC2 in horizontal scaling.
Therefore, you can easily achieve high availability and scalability on the computing and database layer by setting up this architecture.
Lightsail, on the other head, is an easy-to-use service helping you to build the architecture mentioned above.
Note:
- As long as you understand the architecture pattern, you don’t need to worry about using EC2, ECS, or EKS. Those are just computing resources.
- You choose one to meet your situation as you deeply understand how it works and the trade-offs.
Vertical Scaling vs. horizontal Scaling
As a website becomes more popular and has more user traffic, while the API performance would become much slower.
To meet the growing demand of user traffic, we have two approaches to ensure API can achieve the same performance.
Vertical Scaling
- Increase the specs of CPU, RAM, or Hardware on EC2 instance.
Horizontal Scaling
- Add more EC2 instances as the traffic grows.
Note:
- Lighsail does not support auto-scaling which means you need to manually increase EC2 nodes as traffic grows.
- You still can achieve auto-scaling by implementing a Lamda to scale out EC2 by monitoring the metrics from CloudWatch.
- Lightsail can save you time to easily manage and set up a load balancer, EC2, and database.
- Beanstalk can achieve complete auto-scaling and ensure high availability for WordPress.
Then let’s practice setting up the 3-tier architecture for WordPress on Lightsail to achieve high availability and scalability.
Setup WordPress on Lightsail
Create S3 Bucket and IAM to access
- Create S3 bucket: on AWS
- Create IAM access S3 bucket with the following policy
{
  "Version": "2012-10-17",
  "Statement":
  {
      "Sid": "VisualEditor0",
      "Effect": "Allow",
      "Action":
      "s3:*"
    ],
      "Resource":
        "arn:aws:s3:::<your bucket name>",
      	"arn:aws:s3:::<your bucket name>"
      ]
    }
    ]
  }
- Generate IAM’s Key ID and Password for later steps
Deploy Instance
- Log in to AWS Console –> Lightsail
- Create an instance

- Log in to Lightsail by clicking Connect using SSH
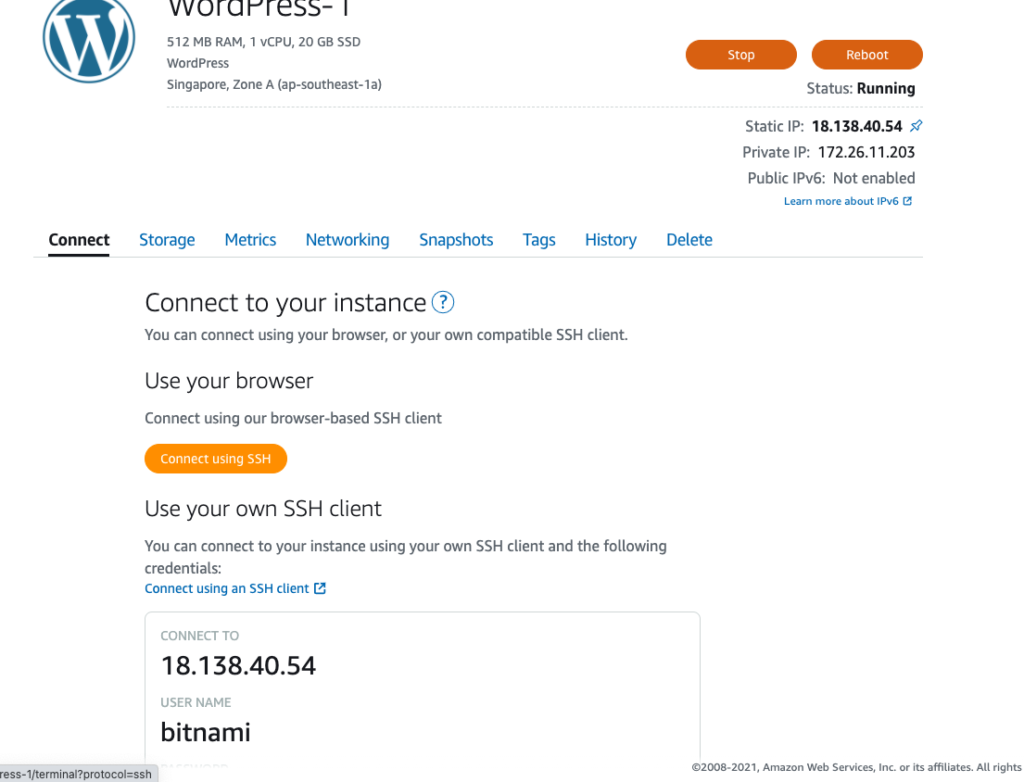
- Get default password
cat $HOME/bitnami_application_password
xxxxxxxxxxx
Edit WordPress config to enable S3
sudo vim /home/bitnami/vim apps/wordpress/htdocs/wp-config.php
// Add the following
define('AS3CF_AWS_ACCESS_KEY_ID', '<Your S3 key ID>');
define('AS3CF_AWS_SECRET_ACCESS_KEY', '<Your S3 Secret Key>');
Edit WordPress config to enable HTTPS for the load balancer
if (strpos($_SERVER;'HTTP_X_FORWARDED_PROTO'], 'https') !== false)
   $_SERVER;'HTTPS'] = 'on';
Create and Setup Database
This step allows us to separate the database from the application server, so we need to export the data from the application server and import it into a shared MSYQL database.
- Create a database instance
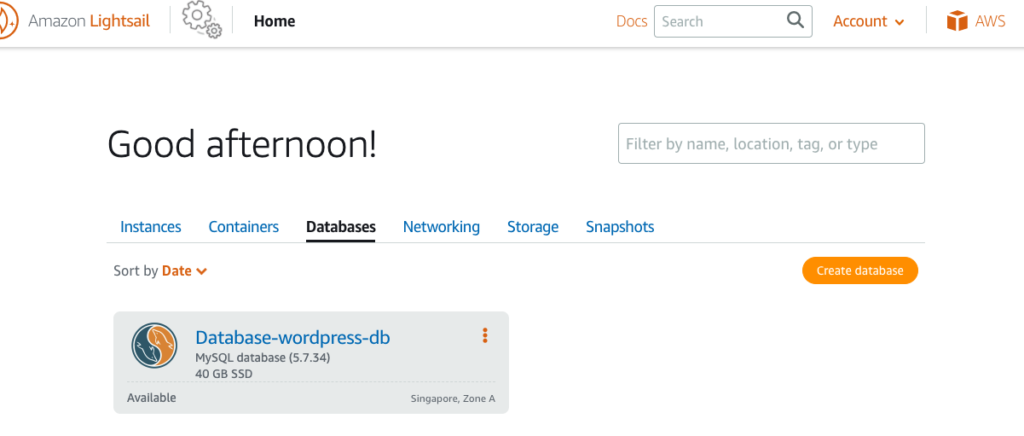
- Then you will get database domain, db username, and password
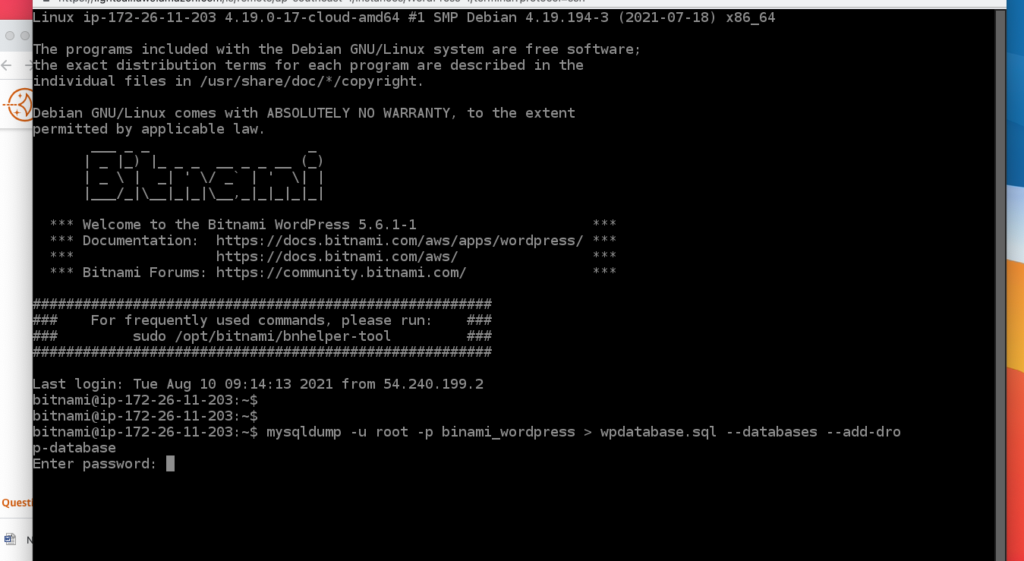
- Export WordPress Data
- Log in to your instance
- Dump wordpress data to SQL file
- mysqldump -u root -p binami_wordpress > wpdatabase.sql –databases –add-drop-database
- Password: <Your default password >
- Import WordPress data into the shared database;
mysql -u dbmasteruser -p -h <Your DB domian>
Input password: <Your DB Password>
mysql>\. wpdatabase.sql
- Setup DB domain, User Name, and Password
sudo vim apps/wordpress/htdocs/wp-config.php
// define( 'DB_USER', 'bn_wordpress' );
define( 'DB_USER', 'dbmasteruser' );
/** MySQL database password */
define( 'DB_PASSWORD', '<Your DB Passowrd>' );
/** MySQL hostname */
define( 'DB_HOST', '<Your DB Domain>' );
Setup Load Balancer & SSL
- Create Load Balancer
- Enable SSL on Load Balancer
- Setup Load Balancer’s domain on Route 53
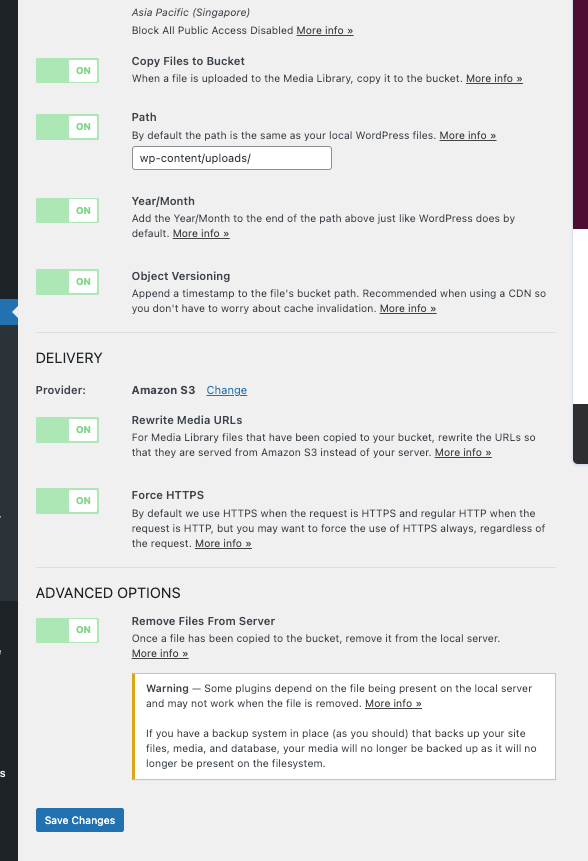
Setup S3 for WordPress uploading images
This step allows you to upload images to S3 instead of saving them on the application server.
- Login to WordPress
- Open
https://<Your Server IP>/wp-admin/ - Install Plugin: WP Offload Media Lite
- Setup Bucket Name:
***<Your Bucket Name>\*** - Enable Force HTTPS and Remove Files from Server and click Save Button
Summary
In this post, you learn the concept of 3 layer architecture to process a high volume of traffic and ensure high availability and scalability. You know how to apply this architecture and set up a load balancer and database for WordPress.
However, this is just the beginning. Once you make your WordPress public, your website will be vulnerable to XML-RPC Attacks.
Before you launch your website, we strongly recommend you set up WordPress properly and carefully validate the website can protect against those malicious attacks.
Next step, how to protect WordPress?
You can refer to 8 Tips to Make Your WordPress Secure and avoid XML-RPC Attack
You might be interested in
How to implement Singed Cookies in Unity with CloudFront?
How to reverse engineer C# and Unity3D Games?